WHAT IS THIS AND WHY DO I NEED IT?
This is a diagnostic tool for pinball machines. At the moment it supports all Williams system 3, 4, 6, 6a, and 7 pinball machines. Support for more games from Williams and other manufacturers will be included at a later date.
This adapter and the included diagnostic software is intended for use by anyone wanting to fix their own pinball machines and keep them as original as possible.
With this adapter and it’s downloadable documentation you can run multiple diagnostic tests directly on your pinball machine. The tests allow you to troubleshoot the different components of the MPU and driver boards and the devices connected to them. Switching between tests is a breeze – just power down, select the test to run via the DIP switches, and power up again.
It’s small and convenient – you can even use it when considering the purchase of a “project” pinball machine. Simply insert the adapter and run some quick tests before making your decision. As a seller you can use it to guide you in repairs, increasing your machines value and helping you get more from the sale.
NOTE: I am nearing the end of the development phase for an even more time efficient solution: the Pincoder Controller. While it is a much more elegant solution than this adapter, it’s release date is still yet to be determined. See UPCOMING HARDWARE below for more information on the Pincoder Controller. When it does become available you’ll still be able to use this adapter AND keep it up to date without the need for a separate chip programmer.
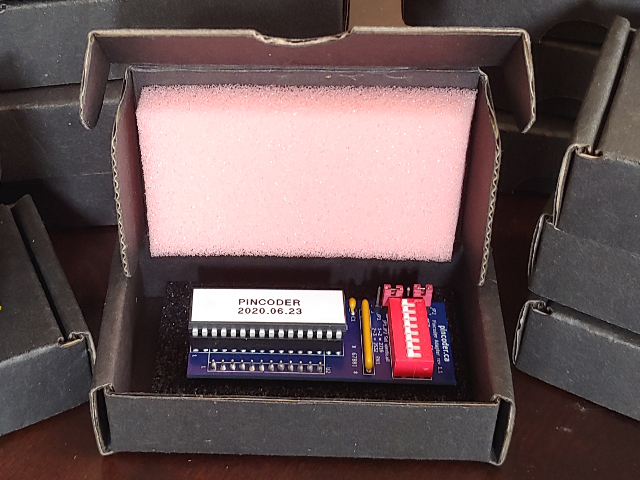
In the mean time, the currently available Pincoder Adapter will allow you to get your testing done right away. Each adapter comes preloaded with ALL of the latest Pincoder ROMs, is assembled by hand, and is fully tested before being shipped.
HOW TO GET ONE: $65 CAD + shipping
I am no longer using PayPal to accept orders. You can however, purchase an adapter via Pinside using this link:
https://pinside.com/pinball/market/shops/1313-pincoder-store/04850-pincoder-adapter-rev-11
At the bottom of the page you can add an adapter to your shopping cart.
By purchasing this item you agree to allow Pincoder Diagnostics to keep your contact and shipping information (including your email address) for the purposes of notifying you when your item ships. You will only receive updates regarding:
- New revisions of this product – including software upgrades.
- New products or services – including the upcoming Pincoder Controller.
You can opt out of this at any time by sending an email to updates@pincoder.ca with “unsubscribe” in the subject line.
Pincoder Diagnostics will not sell or release any of your personal information to anyone, ever. Your billing and payment information are not stored by Pincoder Diagnostics on any of it’s servers. I’m just here to help people keep their pinball machines working!
Terms: The adapter is subject to damage from static electricity and therefore all sales are final. The product is shipped in an appropriate container and each unit is tested before being shipped. Observe all precautions for handling static sensitive devices and ensure that you install and use the adapter in a suitable device with the correct orientation and voltage requirements. Failure to do so may damage the adapter. In addition, the electrical pins on the adapter are subject to bending and/or breakage if not handled correctly during installation, removal, or storage of the adapter. It is recommended to keep the unit stored in its original container while not in use.
Inquiries about your order can made via email orders@pincoder.ca.
Thank you very much for your order. I hope the adapter and the included software help you with your pinball machine repairs!
HOW TO USE THE ADAPTER
- Download the Pincoder software for the version that is labelled on your adapter:
- Version 2020.06.23 – This version is no longer shipped, though it is still supported.
- Version 2021.03.31 – This version is now being shipped with new orders.
- Review the downloaded documentation for the system (sys346/sys6a/sys7) and test you want to run. Start with the “01a-leds” test.
- Review the “pincoder_adapter.txt” file in the Pincoder software you just downloaded above.
- Set jumpers JP1 and JP2 on the adapter as well as the DIP switches accordingly.
- Locate the IC17 chip on the MPU board and take note of which end the notch is on. Remove it from the MPU board and insert the Pincoder Adapter in its place using the same orientation (the notch on the adapter is at the bottom end of the adapter). Note: Three 24 pin chip sockets have been included with the adapter. It is recommended to use at least one of them between the adapter and your board to prevent excessive wear on your board’s socket. Stack all three together if your board limits the placement of the adapter due to the height of nearby components.
- Turn on the game and follow the instructions for the test.
For example, to run the 05-displays test in a Gorgar machine (sys346):
- Review the “sys346/05-displays.txt” file for instructions on how to run the test.
- Review the “pincoder_adapter.txt” file for Jumper and DIP switch settings.
- Set a jumper (included) across pins 1 and 2 of JP1. Pin 3 of JP1 stays unconnected in this case.
- Set JP2 exactly the same as JP1.
- Set the five leftmost DIP switches to 0 (down) and the three rightmost DIP switches to 1 (up).
!!!
!!! WARNING: You must power down the machine before adjusting any of the settings on the adapter.
!!! WARNING: Failure to do adhere to the above warnings may damage your machine and/or this adapter.
The DIP switch settings are from left (closest to the jumpers) to right (at the board edge). A dash (-) means the DIP switch should be set to 0 (down), and a one (1) means it should be set to 1 (up).
FUTURE SOFTWARE UPGRADES
This adapter uses the ST39SF040 EEPROM. The contents of this EEPROM can be upgraded to future versions of pincoder software. Without the upcoming Pincoder Controller you will need an EEPROM programmer capable of writing to the ST39SF040 chip. When the Pincoder Controller is released you will not need a programmer to do the upgrade – the Pincoder Controller will be capable of doing that for you.
Later versions of Pincoder software will contain an updated image for this adapter as well as an updated list of PINCODER ADAPTER SETTINGS. For current settings, see the “pincoder_adapter.txt” file included with the software download for the version installed on your Adapter.
I HAVE A CHIP PROGRAMMER – CAN I USE THIS ADAPTER ON OTHER HARDWARE WITH OTHER IMAGES?
At the moment, this adapter contains only Pincoder ROMs. Since the adapter is compatible with 2716 and 2532 chips, you can use it with any hardware that uses either of those chips. Just load the appropriate images into the EEPROM with your programmer and make note of the DIP settings (the starting address of the desired image) required to use them:
- 2K images use Jumper settings 1-2 and all 8 dip switches to select the desired image in the EEPROM.
- 4K images use Jumper settings 2-3 and the leftmost 7 dip switches to select the desired image in the EEPROM. In this mode, the rightmost DIP switch is ignored.
The address (DIP switch setting) for each image is binary encoded with the MSB first (DIP switch closest to the jumpers).
You can combine 2K AND 4K images on the EEPROM chip, just make sure that they are written to the 2K and 4K page boundaries. For efficient storage you should write all of your 2K images followed by all of your 4K images – do not intermix them.
If you have an odd number of 2K ROMs you will have to add one empty 2K ROM image in order to successfully start adding 4K ROMs.
Also, the page size of the ST39SF040 EEPROM is actually 4K and the entire chip doesn’t have to be erased just to write a 4K image. Ultimately the programmer you use will determine whether it will allow you to erase and rewrite a single 4K block without erasing the whole chip.
However, if you want to rewrite a 2K image be aware that it will require erasing an entire 4K block do to so. This means you’ll want to make a copy of the OTHER 2K half of the 4K block so that you can rewrite it as well. Again, your chip programmer may do this for you, it may not.
The ST39SF040 EEPROM on this adapter can contain up to 256 2K ROM images, or 128 4K ROM images. Since both sizes are usable on the chip, the limit to the actual number of possible combined ROMs varies. With the current software release the chip on the adapter is only 28% full – lots of room for growth and other images!
UPCOMING HARDWARE
This Pincoder Adapter is meant as an intermediary and low cost solution to get you up and running with diagnostics. There is an upcoming board (Pincoder Controller – soon to be released) that:
- Will also not require a chip programmer or hard-to-find chips.
- Will not require the use of DIP switches.
- Is substantially more convenient to use.
- Performs future Pincoder Controller upgrades to Pincoder Software automatically.
- Will allow you to update the EEPROM in your Pincoder Adapter.
- Will allow you to use third party ROM images of your choosing out of the box.
- Will allow you to leave the Pincoder Controller installed to run the original ROM image for your game.
- Will be compatible with larger chip sizes and therefore the list of different pinball machines you can troubleshoot will grow as the Pincoder ROM set grows to include other games – even from other manufacturers.
In the mean time, I hope you find the Pincoder Adapter and the included diagnostic ROM images useful in troubleshooting and certifying your Williams System 3-7 pinball machine!
SUPPORT, QUESTIONS, AND COMMENTS
I have created a separate thread on pinside for questions and answers related to the Pincoder Adapter itself.